Step by step guides for configuring various IRC clients for use with the Fuel Rats
 HexChat
A step by step guide to getting HexChat (a free IRC client for Windows and Linux) up and running with the Fuel Rats IRC for first time users
| Expand | |||||||||||||||||||||||||||||||||||||||||||||||||||||||||||||||||||||||||||||||||
|---|---|---|---|---|---|---|---|---|---|---|---|---|---|---|---|---|---|---|---|---|---|---|---|---|---|---|---|---|---|---|---|---|---|---|---|---|---|---|---|---|---|---|---|---|---|---|---|---|---|---|---|---|---|---|---|---|---|---|---|---|---|---|---|---|---|---|---|---|---|---|---|---|---|---|---|---|---|---|---|---|---|
1 - Installing HexChatInstallation for HexChat is very straight forward. Follow the instructions in the installer with the default options being sufficient for use with the Fuel Rats IRC. If you wish to save space and are comfortable with the English language, you may optionally uncheck Translations. We recommend keeping the auto updates option checked so the client notifies you when a new version is available however this is personal preference and of course optional! The ’Portable Installation’ option stores HexChat settings in the program directory so it can easily be copied to another computer, although under Windows, you may have to install HexChat to a different location (for example D: drive, or a USB stick) to avoid having to run the client as Administrator.
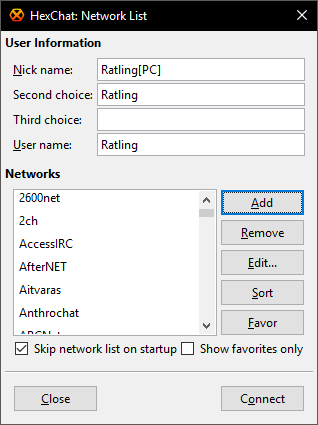
2 - Connecting to the Fuel Rats IRC serverThe first time you run HexChat a Network List window will appear. Enter your desired IRC nicknames (the 3rd is optional). In most cases this would be your CMDR name in-game. Use underscores instead of spaces, if you have any in your name.
The ‘User name’ field is the name that shows up if anybody queries who you are in IRC and should match your registered IRC nick (see the IRC FAQ).
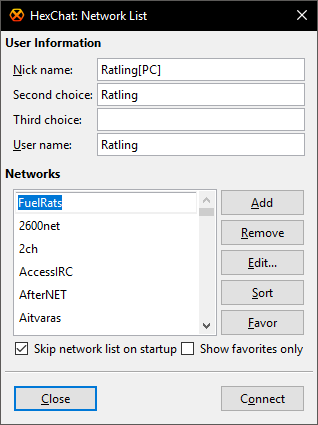
Example entries, your name may differ! Once you have entered your nicknames, click on the ‘Add’ button. This will insert a new network at the top of the list. Click/type to rename the network to FuelRats as shown below. Press enter to save the name.
With the FuelRats network selected, click on ‘Edit…’. This will open up a 2nd window to configure how to connect to the Fuel Rats IRC server.
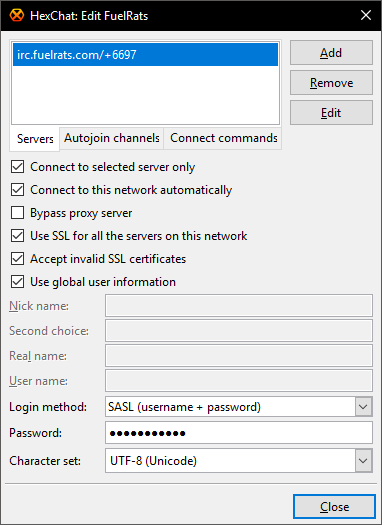
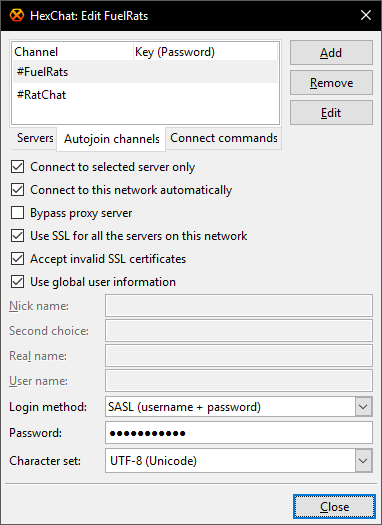
To add a server to the list at the top, click ‘Add’, type irc.fuelrats.com/+6697 and press Enter to save. Copy all other settings as shown. If you plan on using HexChat for more than just the Fuel Rats, you can uncheck “Use global user information” and specify your per-network nick names here.
The ‘Autojoin channels’ tab allows you to specify which channels HexChat will automatically join when connecting. We use primarily 2 channels that you will normally need to be connected to. #FuelRats (where official rescues are conducted) and #RatChat (informal chat and rescue discussion channel). Adding channels is done in the same way as the previous list boxes. Click ‘Add’, type the name and press Enter to save. Repeat this process for as many channels as you wish. When you are happy with your settings, click ‘Close’ to return to the Network List window followed by ‘Connect’ to begin your IRC session. If you have replicated all of the check boxes as shown above, next time around the client will automatically connect to the Fuel Rats IRC.
Congratulations! You have connected to the IRC.
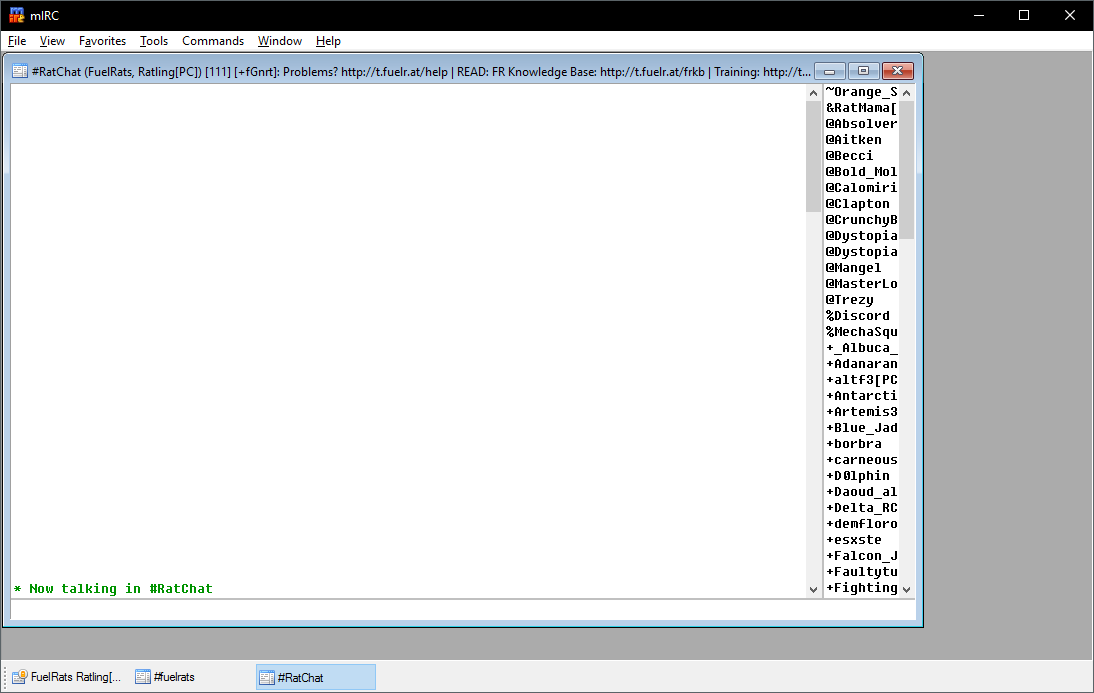
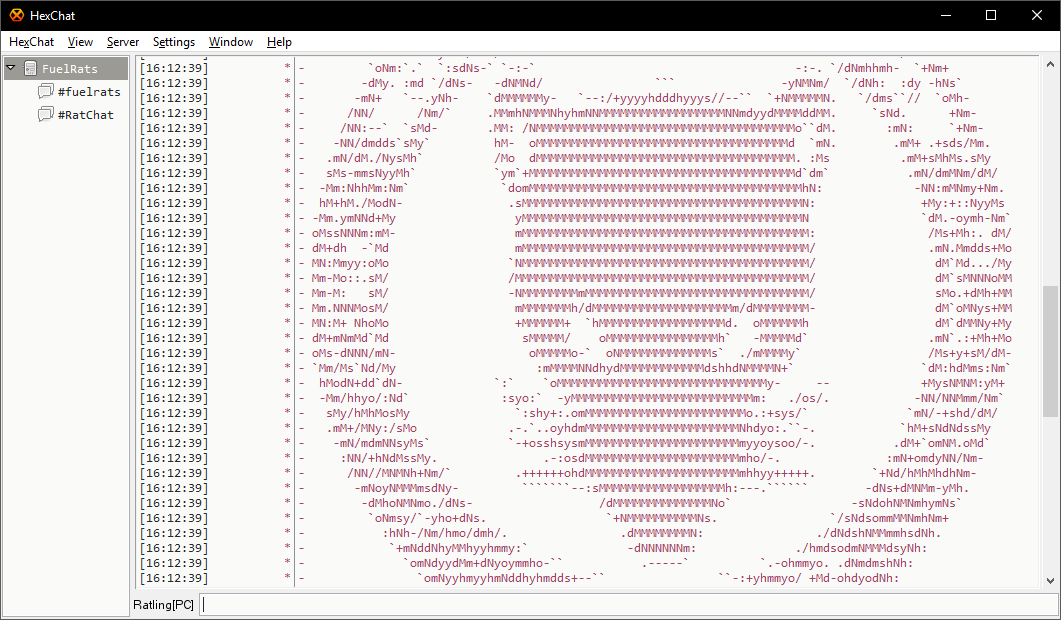
The general HexChat layout has channels you are connected to on the left (the top entry is the Status window which shows important messages from the server) the main chat area with nicknames and time stamps in the center and connected users listed down the right side when viewing a channel.
3 - Changing the appearanceThe appearance of HexChat can be customized in various ways including layout, fonts and colors. To begin changing these settings, within the main HexChat window click on the Settings menu followed by Preferences.
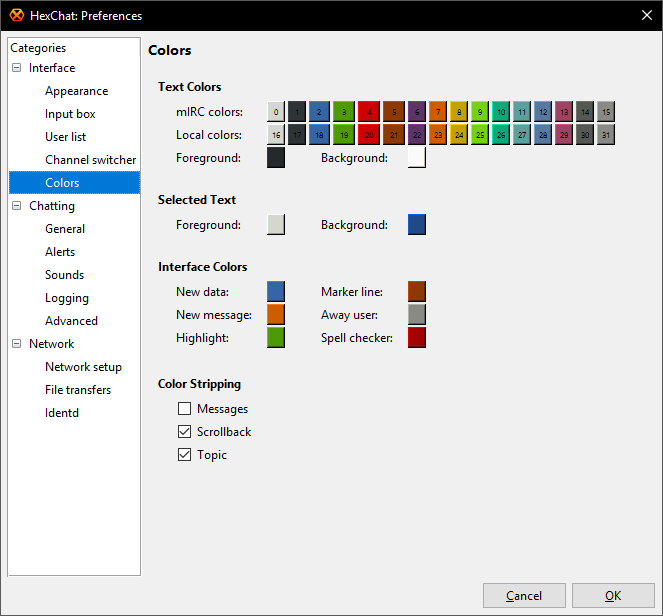
The main settings window will open. This may appear somewhat confusing at first glance but fear not, it's all rather logical! A common request is to change the background and text colors to a dark theme. Click on Colors in the Interface section. By reversing Background and Foreground (click on each one to open the color picker) a darker theme can be quickly achieved. Changing of fonts and colors is of course personal preference and some experimentation will be required! To preview your changes you need to click on OK which closes the window and applies your chosen settings. You'll have to open/close the Preferences window until you reach your desired look (takes a little while to get it right). Alternatively you can visit the Hexchat website and download pre-prepared themes (see link at the top in Related Articles). Other settings you may wish to experiment with:
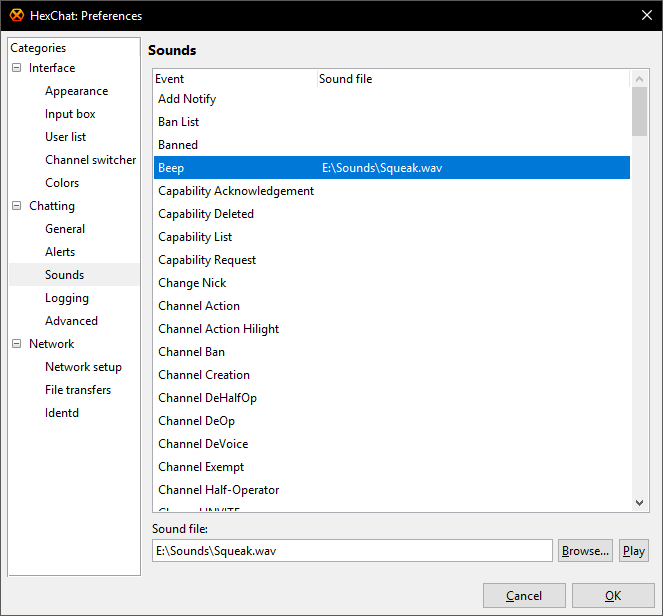
4 - Sounds and AlertsAs a Fuel Rat it's important (perhaps essential!) to know when a new case is arriving, or when another rat mentions your name without having to keep one eye glued to the IRC window all the time. The Alerts section in Preferences requires a few basic changes to ensure you are "pinged" when a new client arrives. The trigger for most new cases is Ratsignal and this has been entered into the "Extra words to highlight" box shown below.
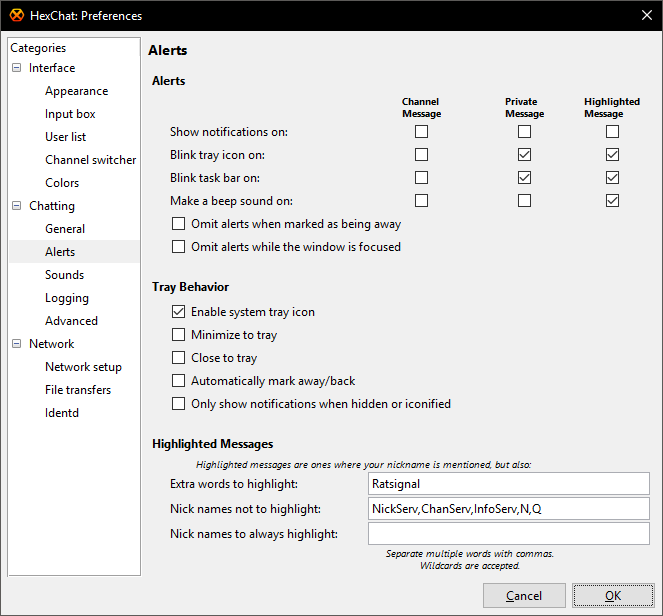 The 'Make a beep sound on: Highlighted Message' option has been checked. Highlighted messages are your nick name and anything that has additionally been entered into the 'Extra words to highlight' box. The default sound is your system's instant messenger alert sound however you can change the sound played in the Sounds section: The file location for your sounds may differ. For HexChat the sound file needs to be a .wav format. There are many other events in the list that you may wish to customiz however the Beep sound will cover the highlighted text. As an additional customization you may also wish to change the highlighted text color and this is set in Interface → Colors → Highlight. An example HexChat setup:
5 - Tips and TricksDid you know you can use the tab button while typing a message to automatically complete another user's name? By typing the first 2 or 3 letters and then pressing the tab key, you can cycle through nickname matches without having to type the full name. Very handy to avoid spelling mistakes! On the subject of spelling, in HexChat you can right click on words while typing for spelling suggestions too! Good luck CMDR, and fly safe with HexChat! o7 |

 mIRC
mIRC
A step by step guide to getting mIRC (an IRC client for Windows) up and running with the Fuel Rats IRC for first time users
| Expand | ||||||||||||||||||||||||||||||||||||||||||||||||||||||||||||||||||||
|---|---|---|---|---|---|---|---|---|---|---|---|---|---|---|---|---|---|---|---|---|---|---|---|---|---|---|---|---|---|---|---|---|---|---|---|---|---|---|---|---|---|---|---|---|---|---|---|---|---|---|---|---|---|---|---|---|---|---|---|---|---|---|---|---|---|---|---|---|
1 - Installing mIRCInstallation for mIRC is very straight forward. Follow the instructions in the installer with the default options being sufficient for use with the Fuel Rats IRC. 'Automatically Check for Updates' is recommended - mIRC will check if there is a newer version when starting the client. The ’Portable Application’ option stores mIRC settings in the program directory so it can easily be copied to another computer, although you may have to install mIRC to a different location (for example D: drive, or a USB stick) to avoid having to run the client as Administrator.
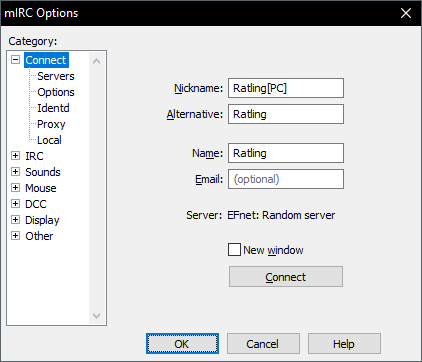
2 - Connecting to the Fuel Rats IRC serverWhen first starting mIRC you are presented with a window to enter your registration details. There is also the ability to evaluate the client if you don't have registration details to hand. After completing that initial process you are presented with the mIRC Options window:
Enter your primary and secondary IRC nicknames. These should match your registered IRC nick(s) (see the IRC FAQ).
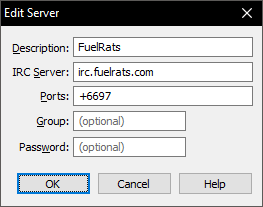
Next, move to the Servers sub category and you will most likely see a long list of popular IRC networks. For simplicity, these have been removed from this guide to avoid confusion. Click on 'Add' to begin adding a new network:
A small popup 'Edit Server' window will appear. Enter details as follows:
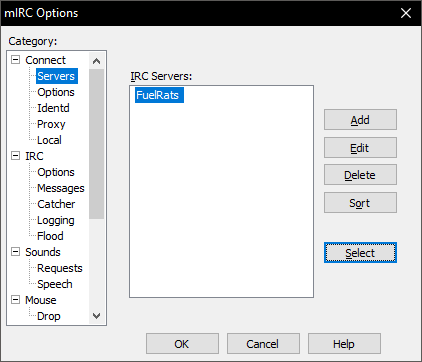
Take care to ensure all of these details have been entered correctly. The server is irc.fuelrats.com and the port must be +6697. Ensure the description is FuelRats as we will reference this name later on. Click OK to return to the mIRC Options window and move down one line to the Options sub category:
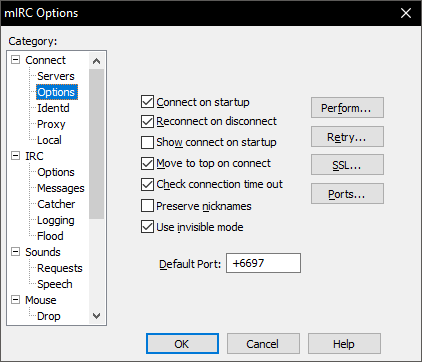
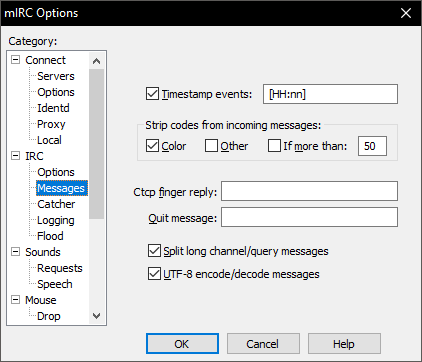
As before, ensure your settings match those shown above. In the Messages sub category you may wish to enable Timestamp events (seeing times in the chat while ratting is useful). Stripping color codes from incoming messages is a personal preference (can be useful to avoid other users spoiling your color settings!).
Before moving on, some other settings you may wish to consider within the mIRC Options window:
You should now have FuelRats in your Servers list:
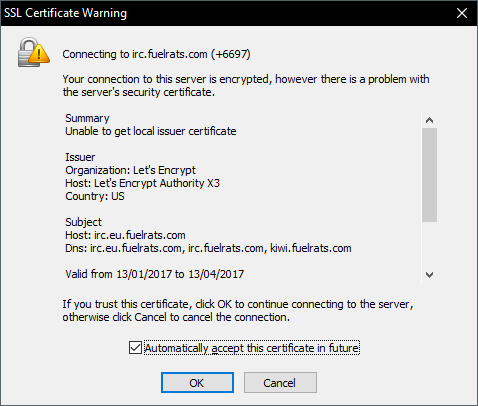
Make sure FuelRats is selected from the list and then click the Select button.You will be returned to the Connect page at the top of the category list. Click the Connect button to log into the Fuel Rats IRC server (you won't have to do this again, next time you load mIRC it will connect automatically). On your first connect you may see a message like this:
Select to automatically accept and click OK.
Congratulations! You have connected to the IRC.
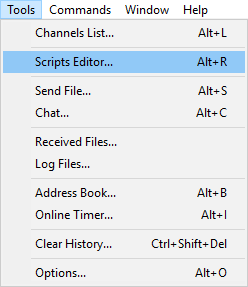
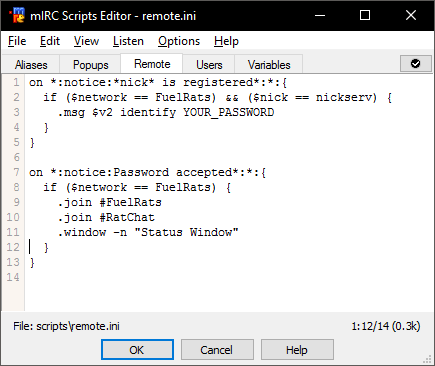
3 - Authentication and auto-joining channelsThis section guides you through configuring mIRC to automatically authenticate and join channels when you connect to the FuelRats network. The IRC FAQ guides you to registering IRC nick(s). If not already done, please follow that guide first to set up your account. Once you have opened your account and registered your IRC nick(s) please continue! Now that you are connected to the Fuel Rats IRC server, press ALT+R (in mIRC) or click on the Tools menu and select Scripts Editor
The mIRC Scripts Editor window will pop up. Select the Remote tab.
Copy and Paste into this editor the following:
You will notice on line 3, YOUR_PASSWORD needs to be replaced with your IRC password that you set in your account. This is private to you, do not show anybody else this information. What does this do?
Of course you can add additional lines as required. Once happy, click the OK button to close the window. The next time you load mIRC you will automatically authenticate and join #FuelRats and #RatChat.
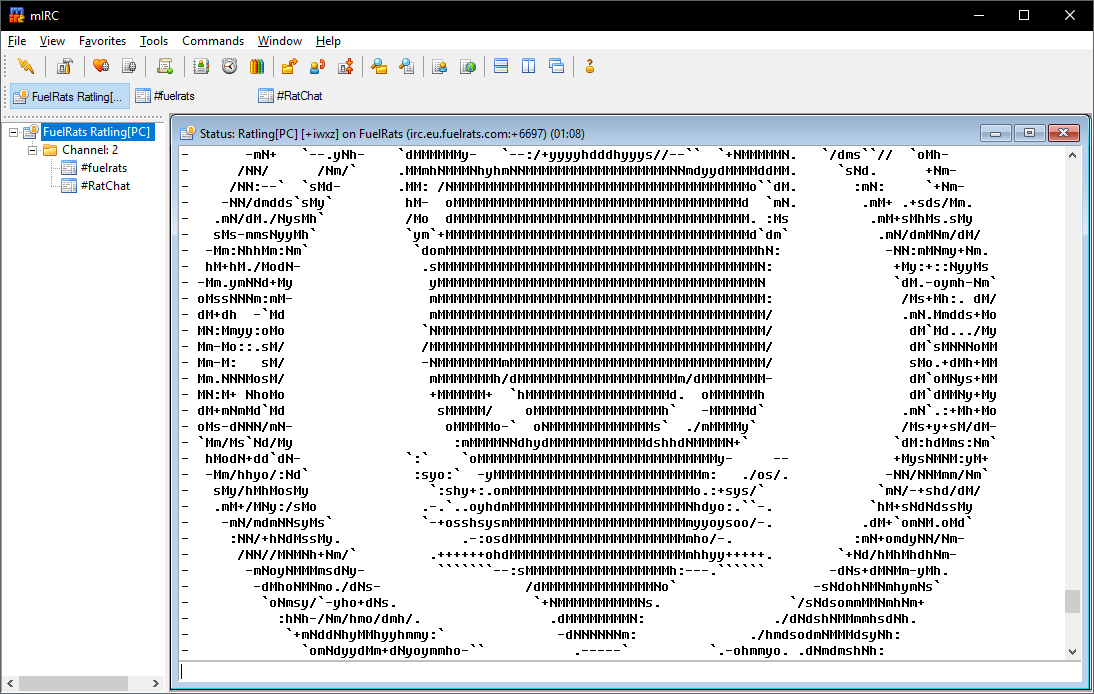
4 - Changing the appearanceDespite what may appear to be a restrictive interface on first glance, mIRC can be extensively customized and is extremely versatile! It's not possible to cover all combinations however this section will demonstrate how to transform the default mIRC into a dark theme with an entirely different layout. Here is our default mIRC. We're connected to the two default channels #FuelRats and #RatChat
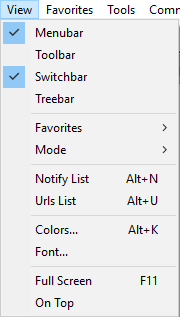
Let's get rid of that toolbar at the top and while we are at it the big blank area to the left! Go to the View menu and uncheck Toolbar and Treebar.
Here's how it looks now:
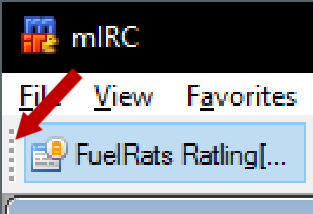
Lets keep working on it. How about we move the Switchbar down to the bottom. Fortunately there is a little grapple on the left side of the bar. Lets have a look:
Grab this and drag the bar to the bottom. While you're at it, lets minimize the Status Window, just click the minimize button to get rid (next time you load mIRC it will get hidden automatically). mIRC now looks like this:
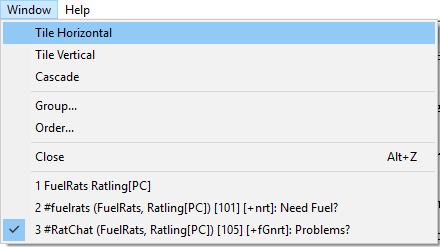
After minimizing the Status window there are two other channels open. #FuelRats and #RatChat. They are both open but one is covering the other. Lets organize these two windows. Resize the main mIRC program to the dimensions you wish and then click the Window menu and select Tile Horizontal:
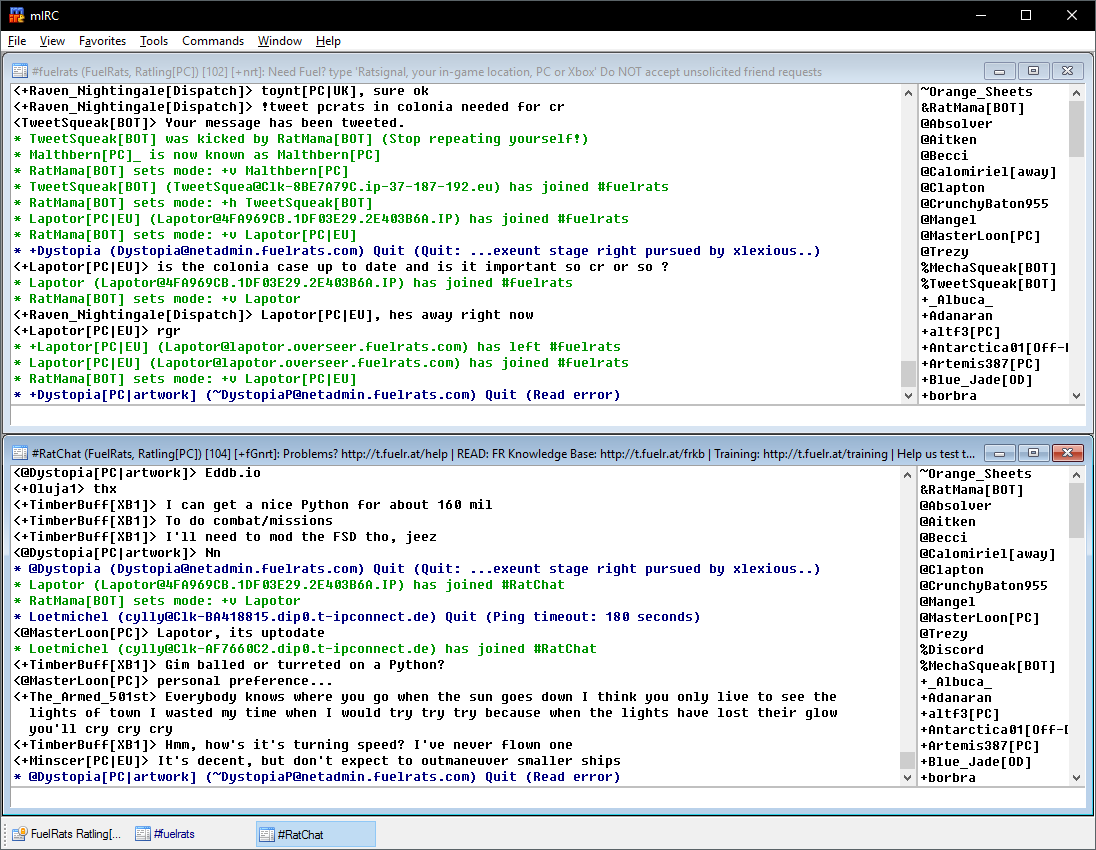
mIRC should now look somewhat like this:
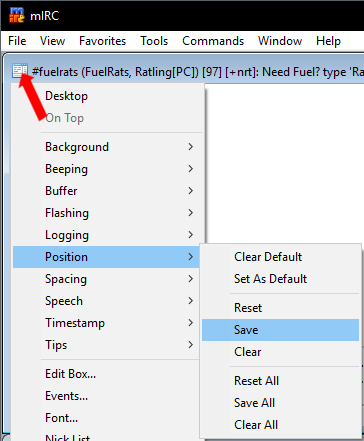
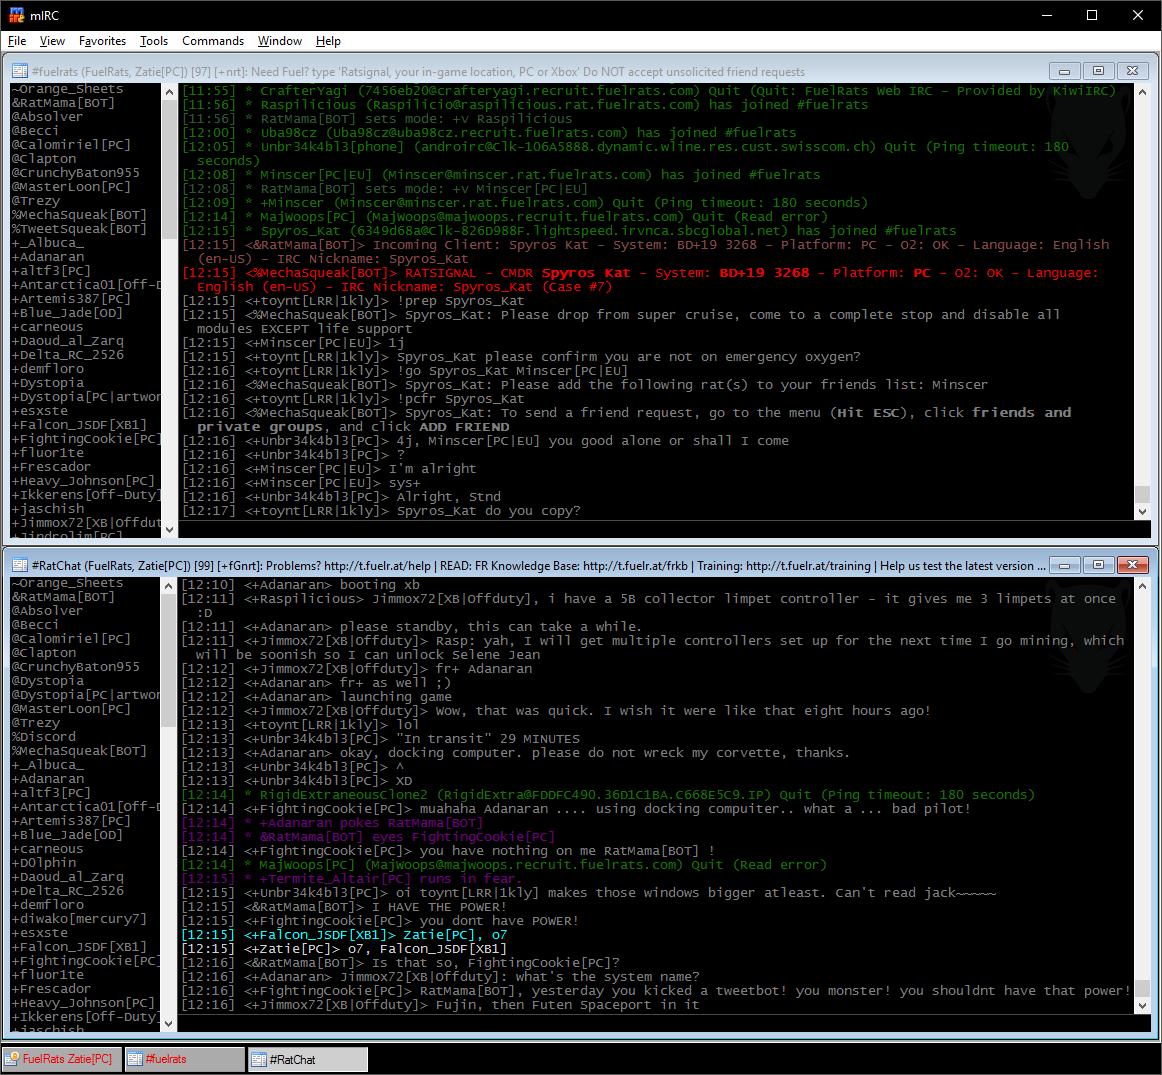
In this example #FuelRats is at the top as it is your first joined channel, #RatChat is below. Things are looking somewhat more organised. Lets look into fonts and colors.If you are happy with the position of each sub window, click on the icon in the top left and select Position → Save (for each sub window).
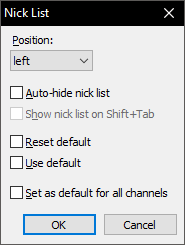
There are various options in the menu to override global settings per channel. One example would be to move the nick list to the left side. Click on 'Nick List...' and change the option accordingly:
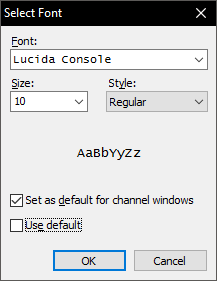
Once again - select 'Set as default for all channels' if that is the setting you wish to apply to all channel windows. Things are looking somewhat more organised. Lets look into fonts and colors. To change the default font, click on the 'View' menu at the top followed by 'Font...'
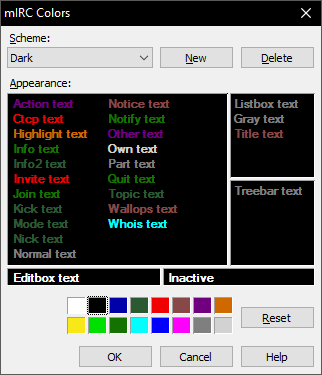
Select 'Set as default for channel windows' to apply the change to your open channel windows. You may find fixed width fonts are easier to read (e.g. Lucida Console, Fixedsys, Consolas, and so on...). To change text and background colors, click on the 'View' menu at the top and 'Colors...'
You can create a new color scheme by clicking 'New' at the top and giving it a name. In the above example colors have been chosen to work with a black background. To change the background colors click on the blank spaces. To change individual text colors click directly on the text you wish to change and pick a color at the bottom. Once you are happy, click OK and your color scheme will be applied. Example dark color scheme:
5 - Sounds and Alerts
|